
low-volume risograph printing.
Based in 📍 Ortigas, PH
[email protected]
Colors
▮ black #000000
▮ f. pink #FF48B0
▮ aqua #5EC8E5
▮ yellow #FFE800
▮ bright red #F15060
Papers
✅ 100GSM white A3
✅ 118GSM white A3
✅ 148GSM white A3
✅ 190GSM white A3
✅ 120GSM cream A4
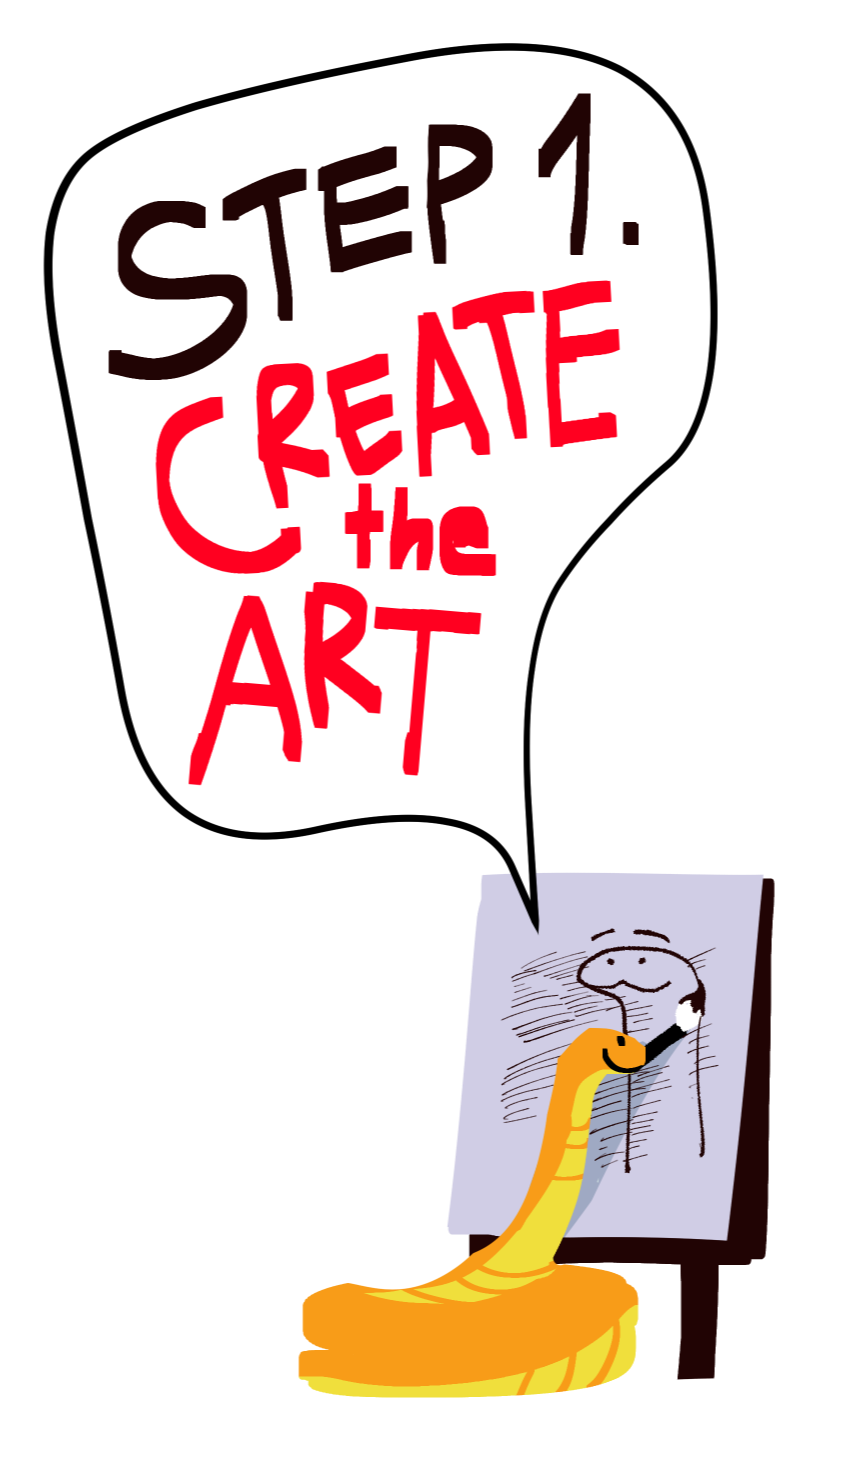
Create art that you would like to have printed.New to designing with riso? Skim the basics ↓
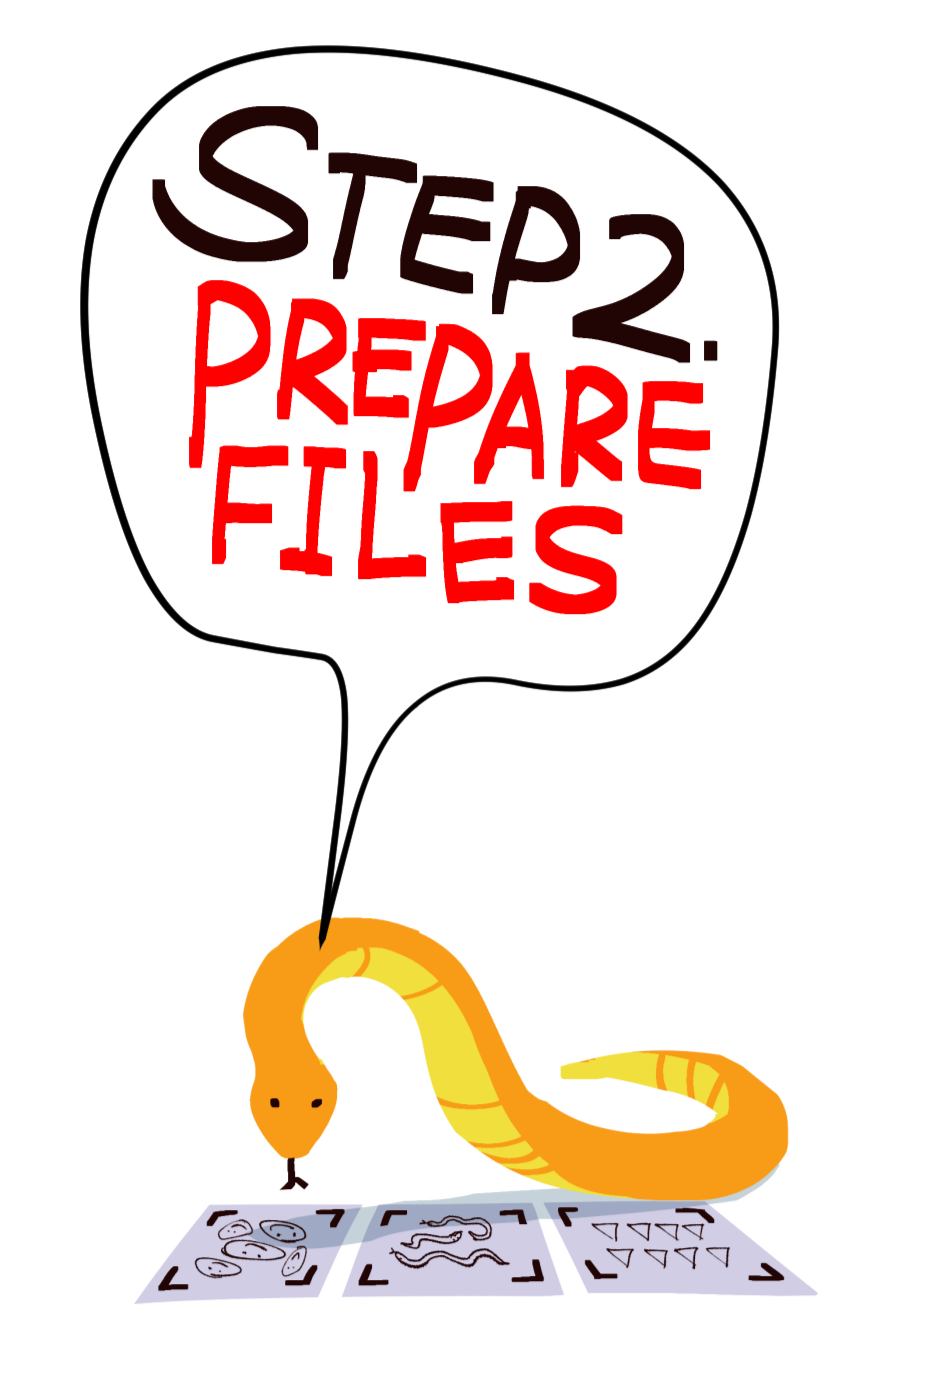
Prepare your designs in PSD, with separated color layers.
Get the templates ↓
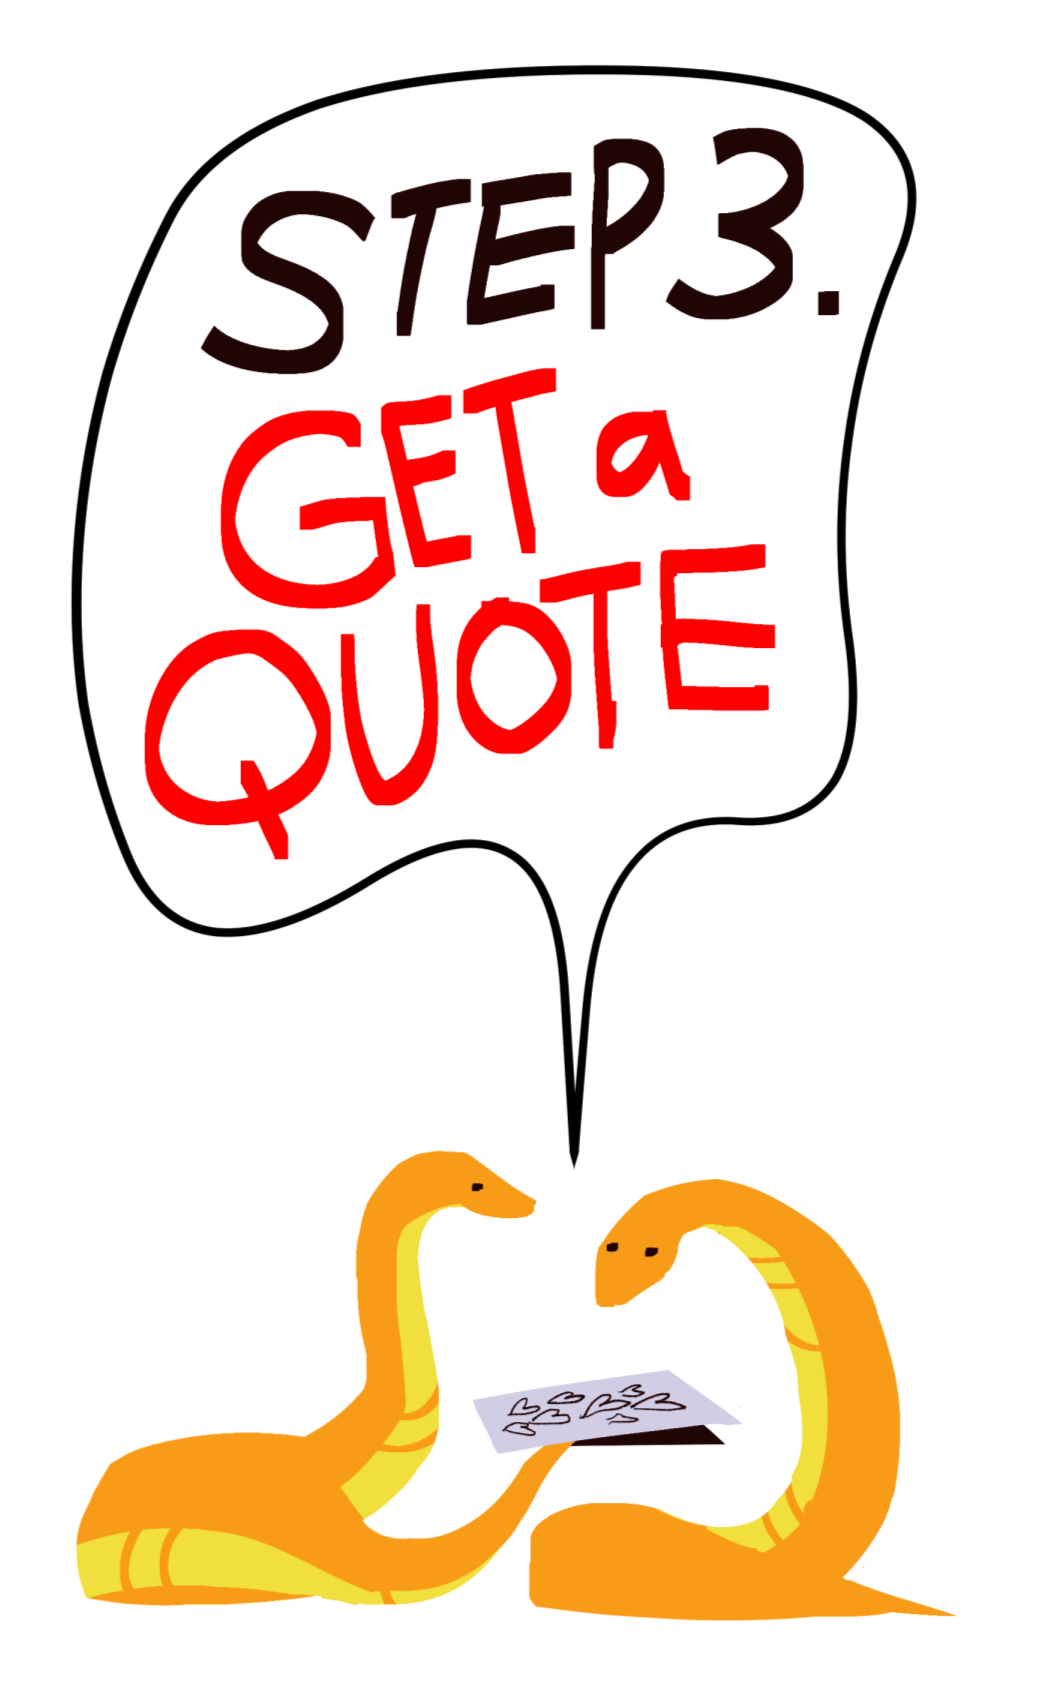
Fill out the quote form with your files. Get a quote now ↓
Riso Basics 101
This guide serves to provide very general tips on how to design with risography in mind.
How does riso work?
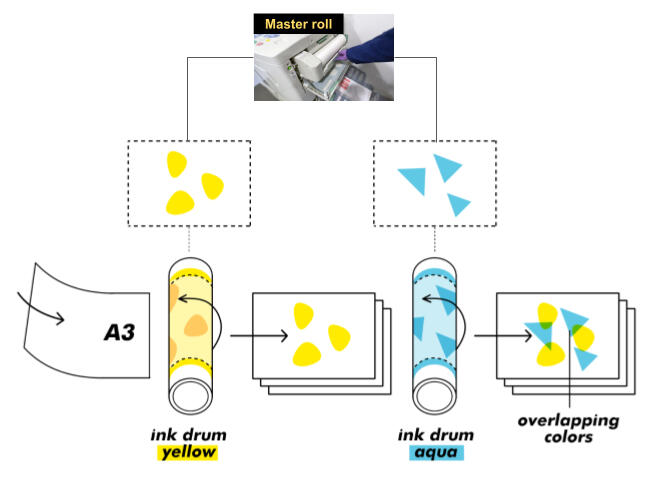
Risograph printing is similar to screen printing. It's a “spot-color” print method that rolls ink on to a paper one ink drum at a time through the stencil of a master.
The ink drum is a large cylinder coated with one ink color. Inside the printer, the drum rolls around the paper to impress the ink.
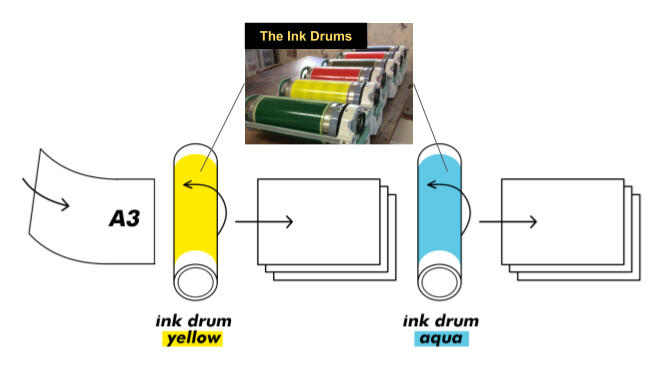
The master is a sheet that acts as the stencil. The pattern is created by detecting the areas of (B&W) darkness of a scanned/digital image.
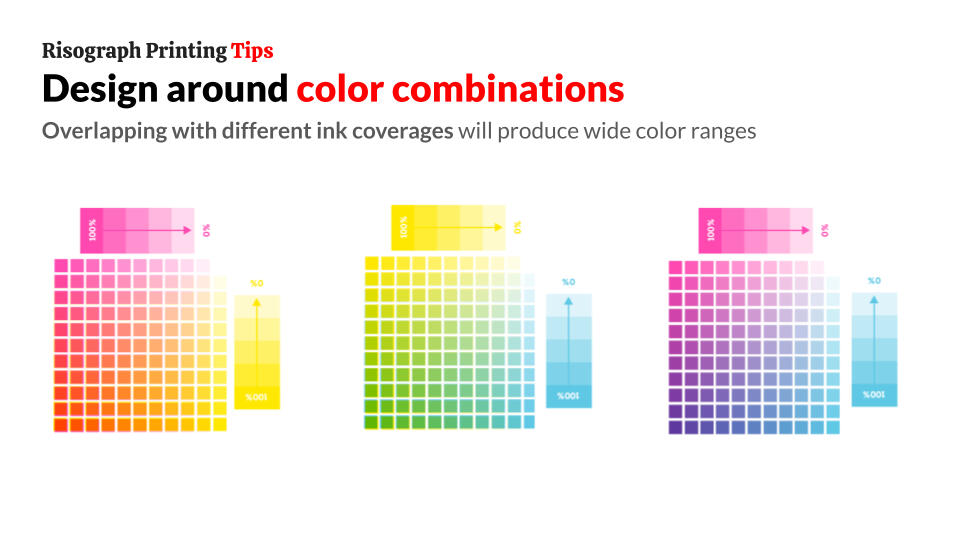
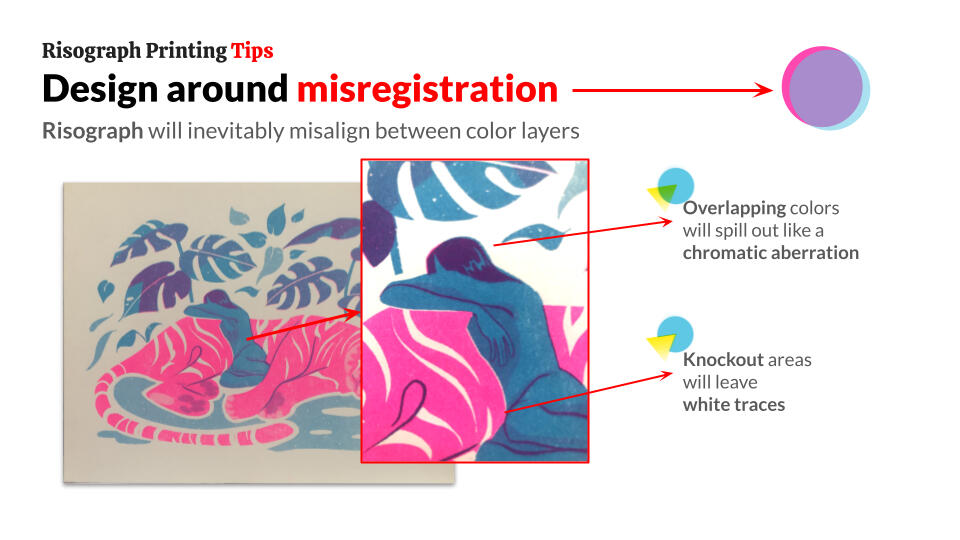
Riso's novelty comes from using its inherent color limitations and print misalignments in creative ways.As a precaution, riso uses soy-based ink that doesn't completely dry, and can smudge especially when the ink is solid and dark.
How do I prepare my art for riso?
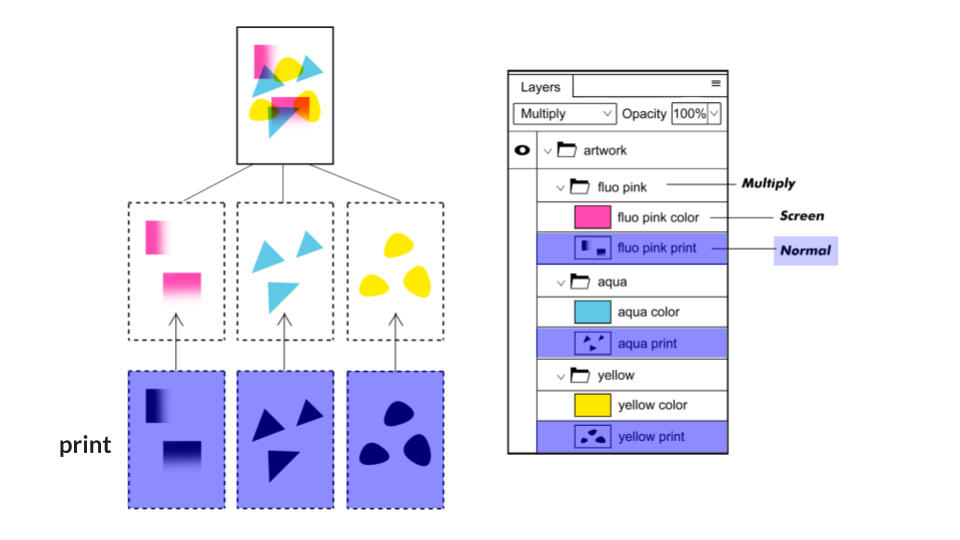
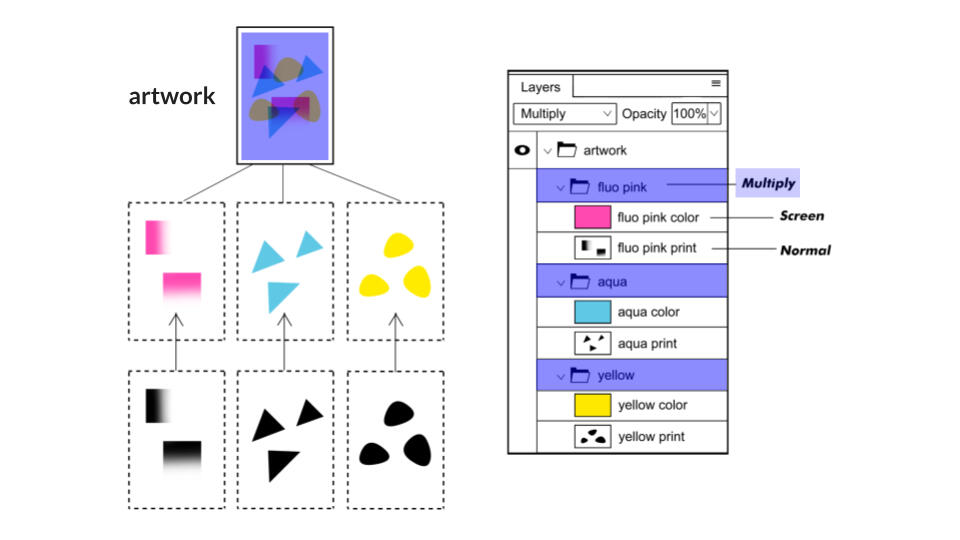
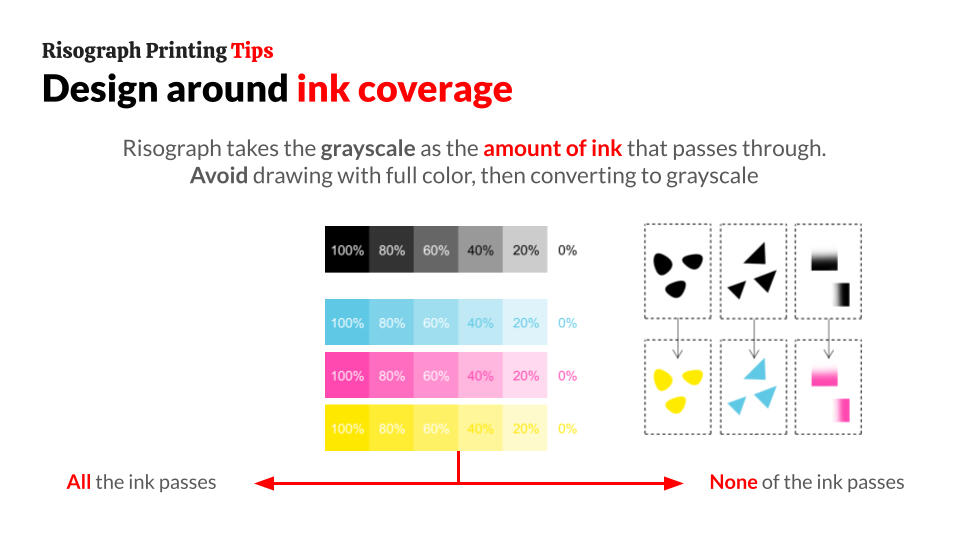
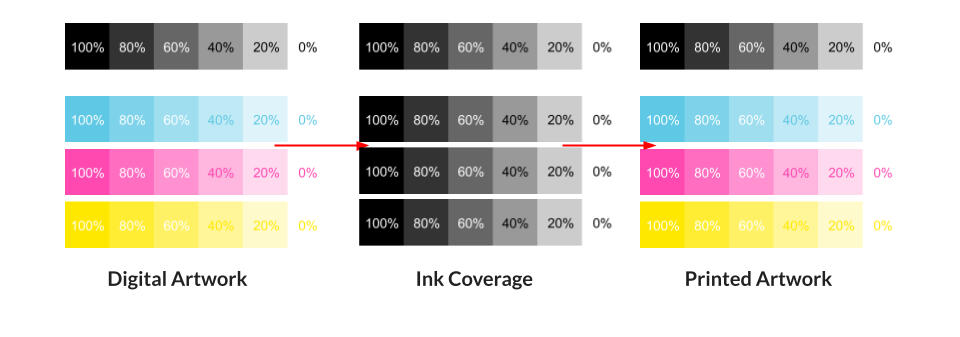
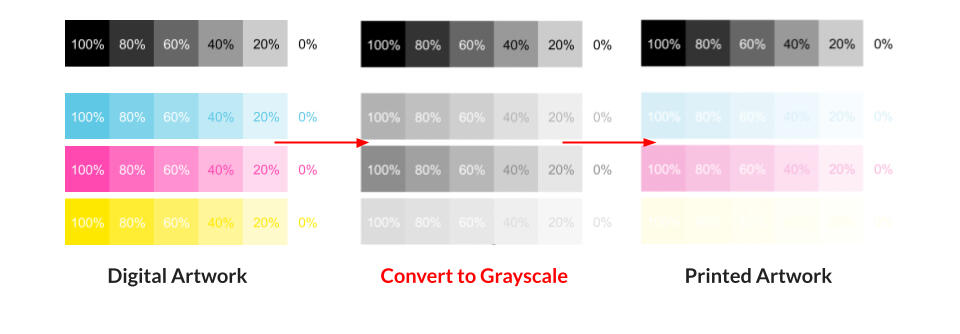
Risograph printers only read grayscale value. This means white (0%) = no ink passes, and black (100%) = all the ink passes, whatever that ink color is.Submit a PSD with layers similar to the image below. These layers are pre-organized in the riso template ↓
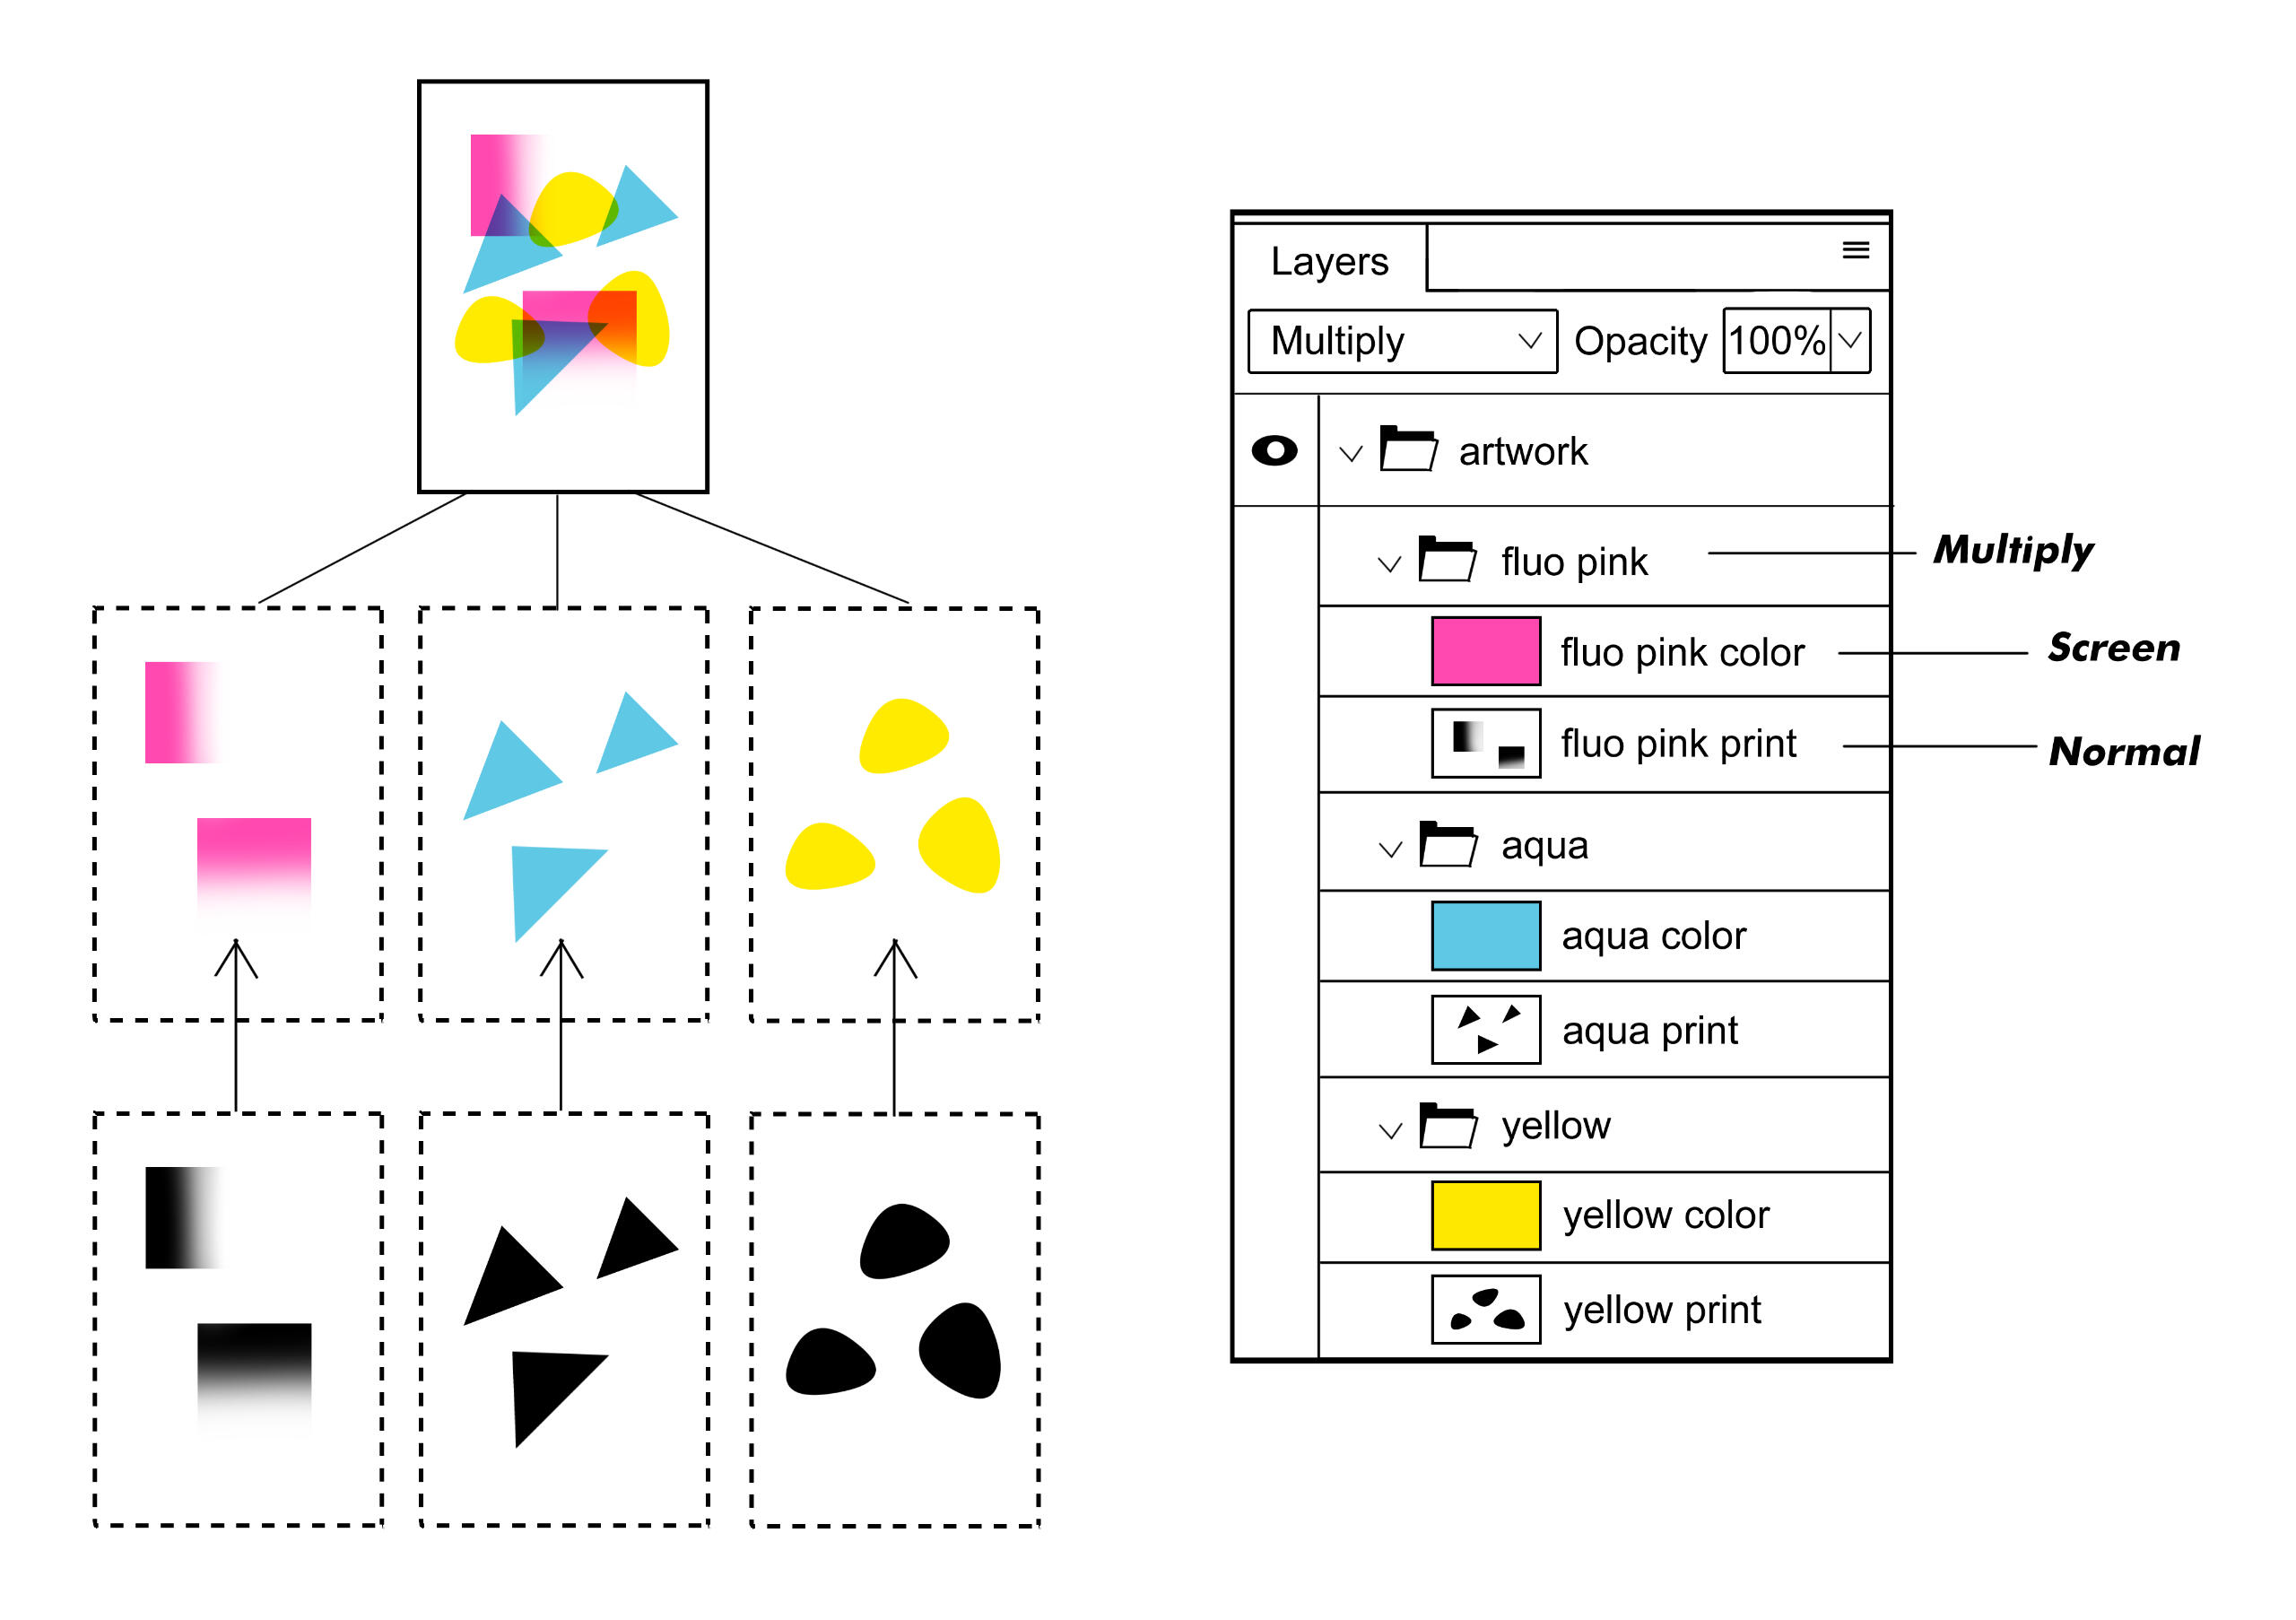
1. Normal B&W print layer per color
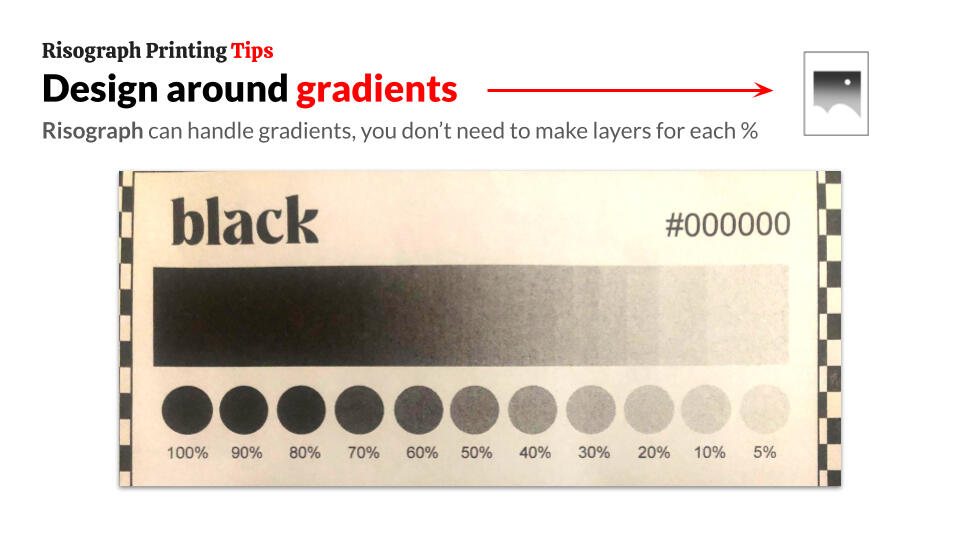
These layers are where you put your artwork. It should be in grayscale, contained in one layer per color. You don't need to separate the layer by 20%, 40%, 60%, etc. values
2. Screen color layer
The riso template already provides a color layer for each available ink, with the correct hexcodes. This is just to help preview what the final print will look like.
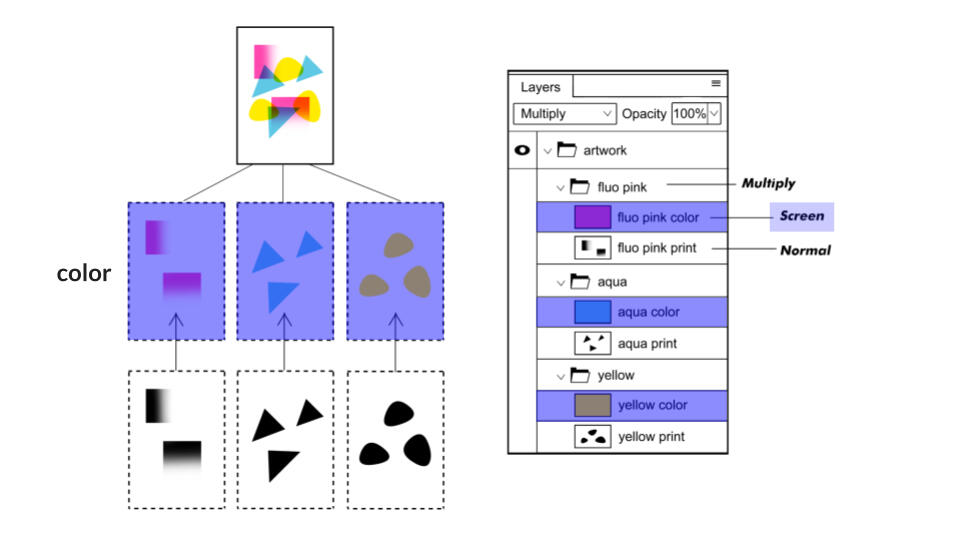
3. Containing artwork folders to set to multiply
This simulates the overlapping color effect the actual print will have.
Riso Printing Tips

Examples

dnncats

bvnnylvx

chickpeamcb

test prints

test prints

test prints


Risograph Templates
If you are unfamiliar with designing for riso, be sure to skim through the guide before using the templates!

Make sure your art matches the DPI of the template to avoid resizing issues.
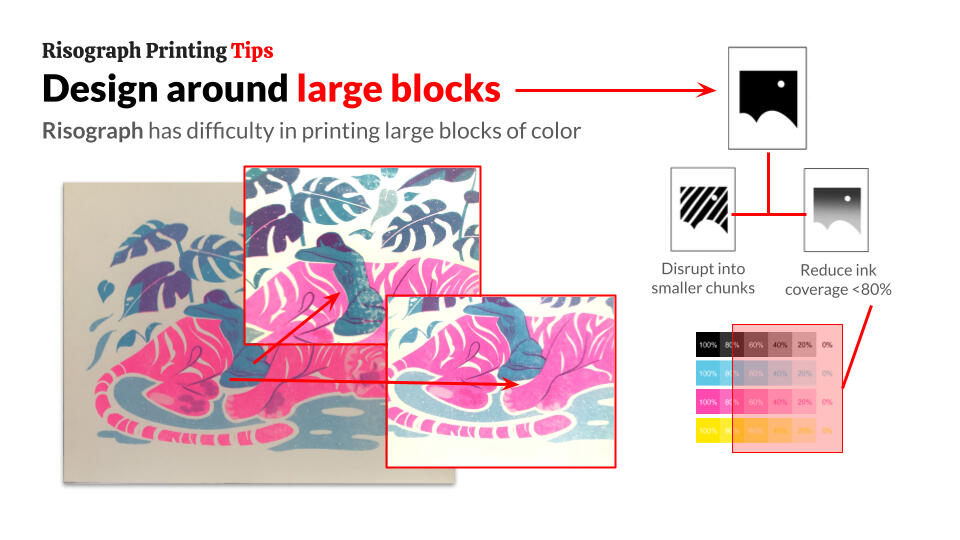
Avoid large chunks of solid color as much as possible.
You do not need to separate each ink layer by its %. Risograph will detect gradients of any color all on 1 layer.
You do not need to change the color profile. The colors you see are the colors you will get.
Send your PSD with layers to the quote form.
This calculator is meant to be a rough estimate, and is not reflective of the actual quote. It also does not factor delivery costs. (may take a while to load)
Contact Us
If your order is more complex than what can be filled in the quote form, or for further inquiries, fill the form below or contact me at [email protected]
About
Sneckoil Press is run entirely by @sneckoil
Please be patient, I am just one person (with a day job)! I usually respond between 5PM to 11PM.I can send prints within the Philippines, but the delivery cost is shouldered by you (pickup/delivery service/LBC).The yellow snake mascot's name is Christian. You can also call him Father Valencia. He thinks he's handsome.

Sneckoil Press
low-volume risograph printing.
Based in 📍 Ortigas, PH
[email protected]